Custom VBA class HTMLElement and how to use it
Writing VBA to create HTML code is tricky
A HTML page is built up from HTML elements. All HTML elements follow a standard pattern consisting elements, attributes and values.
This suggests that writing code to create HTML will benefit from a class specifically for creating HTML elements and assembling HTML.
Actually, such a class exists in asp.net where it is called TagBuilder.
We've added a similar class to the Code VBA add-in and named it HTMLElement.
The software also has two collections of prefab fragments for fast insertion of code based on HTMLelement, the first collecting is for writing HTML pages,
the second for filling .HTMLBody of an email. As an example, to easily code an image using the img fragment.
Without the HTMLElement class, you would write code like
<img src="images\builder.png" alt="builder in action"/>
If you want to add this to the page string you are building, that requires some tricky formatting to get the quotes right:
strPage = strPage & "<img src=""images\builder.png"" alt=""builder in action""/>"
That is when working with a fixed string. If you want to use variables, it gets even trickier:
strPage = strPage & ""<img src=""" & strImage & """ alt=""" & strImageAlt & """/>""
(Fortunately, the Code VBA add-in has a tool for this task, the String Builder)
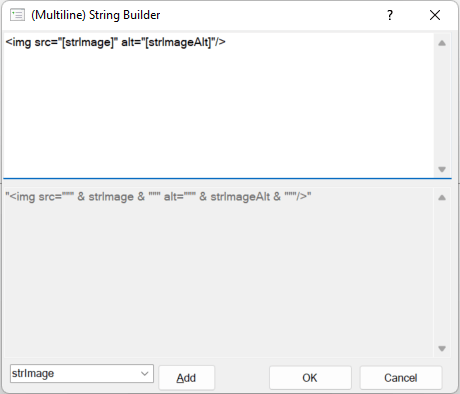
Note the use of double-quotes and & to combine the variables with strings.
Solution: using class HTMLElement
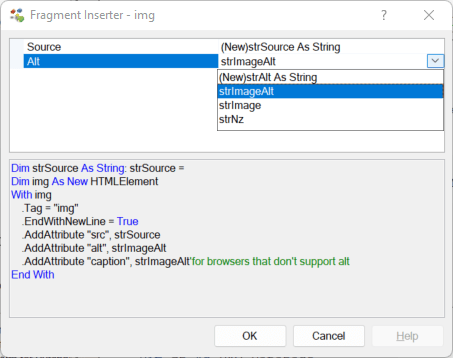
Below shows how you can code the HTML img element effortlessly using class HTMLElement.
Dim img As New HTMLElement
With img
    .Tag = "img"
    .EndWithNewLine = True
    .AddAttribute "src", strImage
    .AddAttribute "alt", strImageAlt
    .AddAttribute "caption", strImageAlt 'for browsers that don't support alt'
End With
Observe that:
- The img variable is first declared
Dim, named and instantiated using theNewkeyword; - Each element begins with specifying the
.Tag = "img"; - Optionally, you can indicate you want the next tag to start on a new line for readability:
.EndWithNewLine = True; - Attributes are added to the element using the
AddAttributemethods.
Note: The Code VBA add-in has fragments for the most uses html elements in the HTML Page Writer subsystem and ... under Outlook » HTML Body. This saves typing, and gets you the required attributes right directly. The Fragment Builder lets you select available string variables or the creation of a new string variable. When a fragment uses the HTMLElement class, this class is automatically added to the project.
Nesting HTML Elements
The top HTML element is <html>. It always contains the <head> and <body> elements. For this reason the HTML fragment has them already in place:
Dim html As New HTMLElement
With html
    .Tag = "html"
    .AddAttribute "lang", "en"
    Dim head As New HTMLElement
    With head
        .Tag = "head"
        'see Setting the Viewport on https://www.w3schools.com/tags/tag_meta.asp'
        'see https://www.w3schools.com/tags/tag_style.asp'
        .AppendContentValue "<meta http-equiv="Content-Type" content="text/html; charset=utf-8" />" & vbNewLine & _
            "<meta name="viewport" content="width=device-width, initial-scale=1"/>" & vbNewLine & _
            "<meta name="x-apple-disable-message-reformatting">"
    End With
    Dim body As New HTMLElement
    With body
        .Tag = "body"
        .EndWithNewLine = True
        'continue here defining the (HTML)Elements that build the content'
        'and add them using .AppendContentElement (and/or .AppendContentValue)'
    End With
    .AppendContentElement head
    .AppendContentElement body
     strPage = "" & vbNewLine & .Text
End With
Dissecting this code:
- The are <head> and <body> elements are added to the global <html> element using
.AppendContentElementmethod (last few lines); - You don't have to use the HTMLElement everywhere, sometimes it is just as good to insert part of the HTML as a string.
This is done here using the
.AppendContentValuefor the <meta> element; - The meat of the page is ofcourse inside the <body> element. Continue adding elements there: <h1>, <p>, etcetera;
- Use nesting when appropriate, e.g. having an <a> inside a <p> element.
- To get the HTML string from the HTML element class, with all subordinate elements, use the
.Text method (final line); - If you are creating a HTML document, precede it with a fixed string like "<!DOCTYPE html>".
More features
Because they are use so often, additiononal properties have been added for setting attributes ID and Title.
With it, you can use .ID = "id1" as a shorthand for .AddAttribute "ID", "id1"